19:20
HOW TO SEW A BUTTON (to show my friends next time they ask me to do this SUPER EASY task for them)
Bernadette Banner
Overview
This video provides a comprehensive guide to sewing on buttons, emphasizing its simplicity and practicality. It covers the necessary tools, including needles, scissors, and thread, with recommendations for durable options like silk buttonhole twist. The tutorial details techniques for three common button types: four-hole, two-hole, and shank buttons. Key steps include anchoring the thread securely, creating a thread shank for proper button placement, and finishing the stitch to ensure durability. The video aims to empower viewers with a fundamental sewing skill for garment repair and creation.
How was this?
Save this permanently with flashcards, quizzes, and AI chat
Chapters
- Essential tools include a needle (any type that fits through the buttonhole), scissors, and thread.
- For durability, silk buttonhole twist is recommended due to its thickness and strength.
- Standard sewing thread is also usable, but may require more passes for strength.
- A thimble is highly recommended to protect fingers, especially on thicker fabrics.
Having the right tools readily available ensures a smoother and more efficient sewing process, preventing frustration and potential injury.
Using a standard sewing kit thread, which is thinner, requires an extra step to ensure it's strong enough, unlike thicker buttonhole twist.
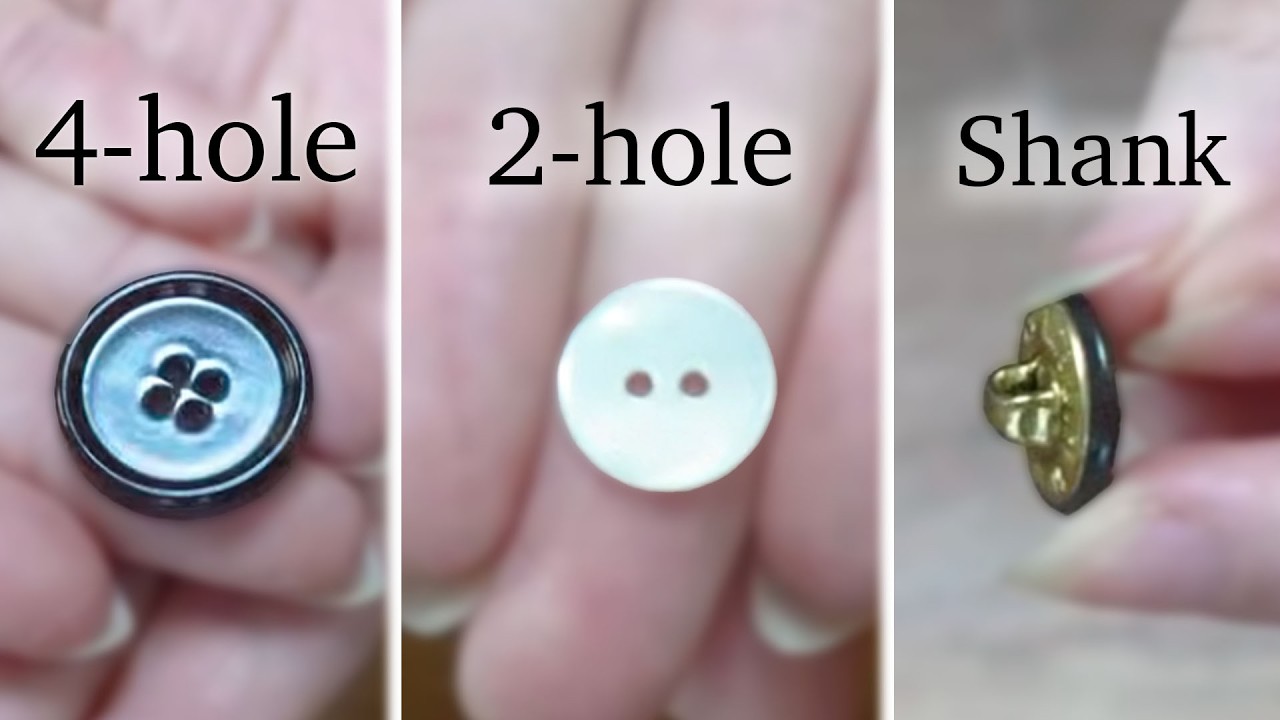
- Buttons vary in material and size, but the key difference for sewing is hole placement.
- Common types include four-hole, two-hole, and shank buttons (which have a loop on the back instead of holes).
- The basic principles of sewing apply to all types, with specific techniques for each.
Identifying the type of button helps in selecting the appropriate sewing method, ensuring a secure and aesthetically pleasing attachment.
A shank button attaches differently because it has a built-in loop, unlike buttons with visible holes on the top.
- Use a thread length no longer than your forearm to avoid tangles; double the thread for thinner types.
- Stiffen the thread tip (by licking, wetting, or waxing) to make it easier to thread the needle.
- Anchor the thread on the underside of the fabric with a secure knot before starting to sew the button.
- For garments with lost buttons, use existing marks or button up the rest of the garment to find the correct placement.
Properly preparing the thread and fabric ensures a strong start to the sewing process, preventing the button from coming loose prematurely.
To anchor the thread, make a small stitch on the lining side, loop the needle through, and pull taut to create a knot before starting the main button stitches.
- Position the button and bring the needle up through one hole.
- Sew through the holes in a pattern (vertical, horizontal, or X) 2-3 times for strength.
- Crucially, leave a small space (about a quarter-inch) between the button and the fabric to create a thread shank.
- This space allows the button to sit comfortably and accommodate the buttonhole.
Creating a thread shank is essential for the button to function correctly, preventing fabric strain and allowing it to pass through the buttonhole easily.
Placing a finger under the button while sewing the final stitches helps gauge the correct amount of space for the thread shank.
- Similar to the four-hole button, bring the needle up through one hole and down through the other.
- Repeat this process 3-4 times, ensuring the button is elevated slightly off the fabric.
- The goal is to create a small thread shank for flexibility and durability.
- Maintain consistent stitching through the same holes to keep the button aligned.
The technique for two-hole buttons is simpler but still requires creating a thread shank to ensure the button is not too tight against the fabric.
Testing the button's fit by trying to put it through the buttonhole during the sewing process helps determine the correct shank length.
- Shank buttons are generally easier to sew as the shank provides a built-in attachment point.
- Thread the needle up through the shank and then down through the fabric, repeating 3-4 times.
- Ensure the button sits flush against the fabric, as no separate thread shank is typically needed.
- For thicker fabrics, you might bend the fabric around the shank to simplify stitching.
Shank buttons offer a straightforward attachment method, making them ideal for beginners or when a quick repair is needed.
Holding the fabric around the shank of the button can make it easier to guide the needle through the shank and fabric in one motion.
- After sewing the button, create a strong knot on the underside of the fabric.
- To hide the thread, insert the needle into the inner fabric layer and travel about an inch away before cutting.
- This technique prevents visible threads on the garment's exterior.
- The final result should be a securely attached button that is unlikely to come off.
Properly finishing the stitch ensures the button remains securely attached and the garment looks neat and professional, hiding any signs of repair.
Making a double knot on the underside of the fabric, then burying the thread tail within the fabric layers before cutting it flush.
Key takeaways
- Sewing on a button is a fundamental and accessible skill for anyone.
- Choosing the right thread (like silk buttonhole twist) and using a thimble significantly improves durability and comfort.
- Understanding the different types of buttons (two-hole, four-hole, shank) dictates the specific sewing approach.
- Creating a thread shank by leaving space between the button and fabric is crucial for four-hole and two-hole buttons.
- Securely anchoring the thread at the beginning and end of the process prevents the button from loosening.
- Finishing techniques, like burying the thread tail, ensure a clean and professional appearance.
- A well-sewn button should be strong enough to withstand regular use and strain.
Key terms
NeedleScissorsThreadSilk buttonhole twistThimbleFour-hole buttonTwo-hole buttonShank buttonThread shankAnchor stitchKnot
Test your understanding
- What are the essential tools needed to sew on a button, and why is each important?
- How does the type of button (two-hole, four-hole, shank) affect the sewing technique?
- Why is it important to create a thread shank when sewing on a two-hole or four-hole button?
- What steps can be taken to ensure the thread is strong and easy to work with?
- How can you securely finish the stitching to prevent the button from coming loose?