AI-Generated Video Summary by NoteTube
010 Polish By Features
Michael Pavlovich
Overview
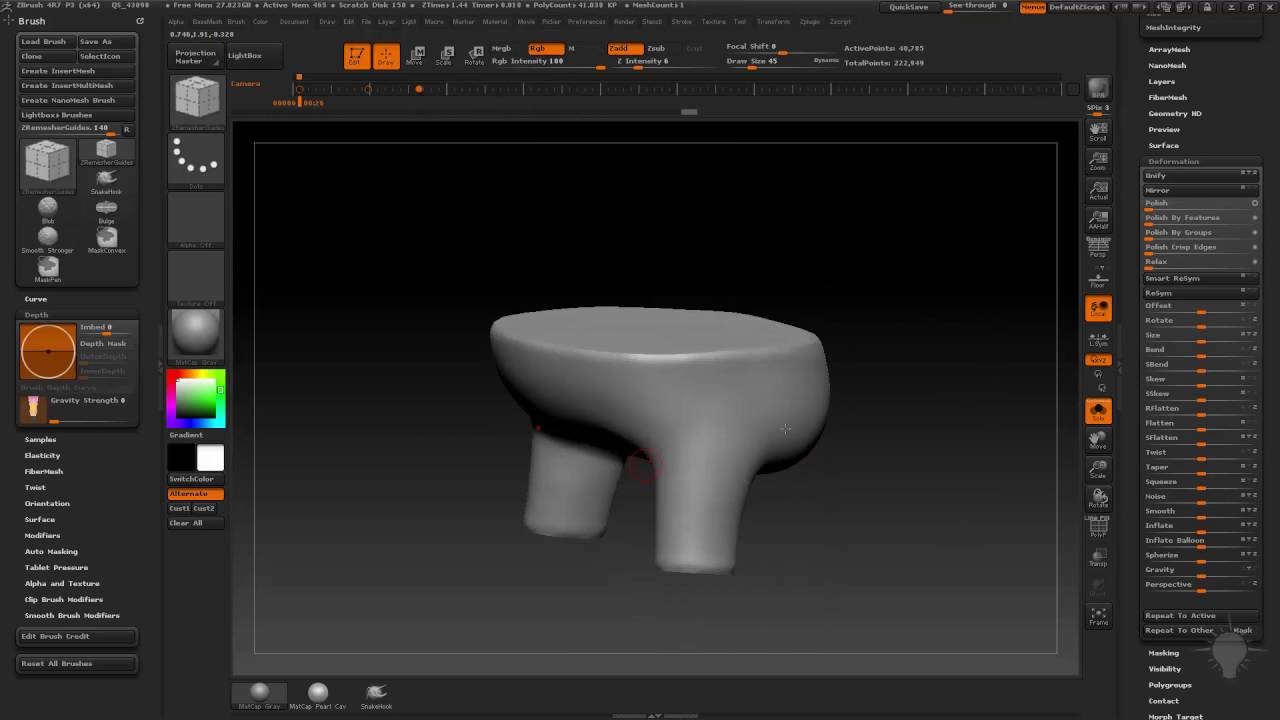
This video demonstrates the "Polish by Features" tool in ZBrush, a powerful function for refining 3D models. The presenter begins by showing how to create masks on a model, specifically focusing on the edges of an object like pants, to define areas for manipulation. Techniques for improving mask accuracy, such as using "mask convex" and adjusting depth settings, are explained. The core of the demonstration involves using these masks to create polygroups, which then serve as "features" for the "Polish by Features" tool. The presenter illustrates how this tool can be used to smooth surfaces while preserving sharp edges defined by polygroup seams, offering options for maintaining or disregarding the original volume during the polishing process.
This summary expires in 30 days. Save it permanently with flashcards, quizzes & AI chat.
Chapters
- •Demonstrates using Alt key to manipulate parts of a model.
- •Introduces the concept of zero meshing for isolated parts.
- •Highlights potential issues with zero meshing, like floppy edges.
- •Explains the use of ZRemesher guides to control topology flow.
- •Uses Control key to activate masking brushes.
- •Explains the 'mask pin' brush for defining mask boundaries.
- •Addresses mask bleeding and introduces 'mask convex' for edge detection.
- •Details adjusting depth mask settings for cleaner edge adherence.
- •Shows how to apply masks to specific areas of the model.
- •Uses the 'Control + W' shortcut to convert masks into polygroups.
- •Demonstrates creating distinct polygroups for different parts (e.g., top and bottom of pants).
- •Introduces the 'Polish by Features' tool found in the Deformation palette.
- •Explains that features can include polygroups, seams, or creases.
- •Demonstrates using polygroup seams as features to maintain creased edges.
- •Shows how increasing the polish value smooths surfaces while preserving defined features.
- •Explains the difference between 'open circle' and 'closed circle' polish.
- •Closed circle aims to maintain the original volume of the model.
- •Open circle disregards volume, focusing purely on smoothing and polishing surfaces.
- •Highlights how 'open circle' can achieve a very smooth, polished look.
Key Takeaways
- 1Masking is a crucial first step for precise model refinement in ZBrush.
- 2Adjusting mask settings like 'mask convex' and depth can significantly improve edge detection.
- 3Polygroups are essential for defining 'features' that the Polish by Features tool will respect.
- 4The Polish by Features tool allows for smoothing surfaces while preserving sharp edges defined by polygroups or creases.
- 5Understanding the difference between 'open circle' and 'closed circle' polish is key to controlling volume preservation.
- 6This tool is effective for achieving both subtle smoothing and highly polished finishes on 3D models.
- 7Combining masking, polygrouping, and Polish by Features offers a powerful workflow for model detailing.